

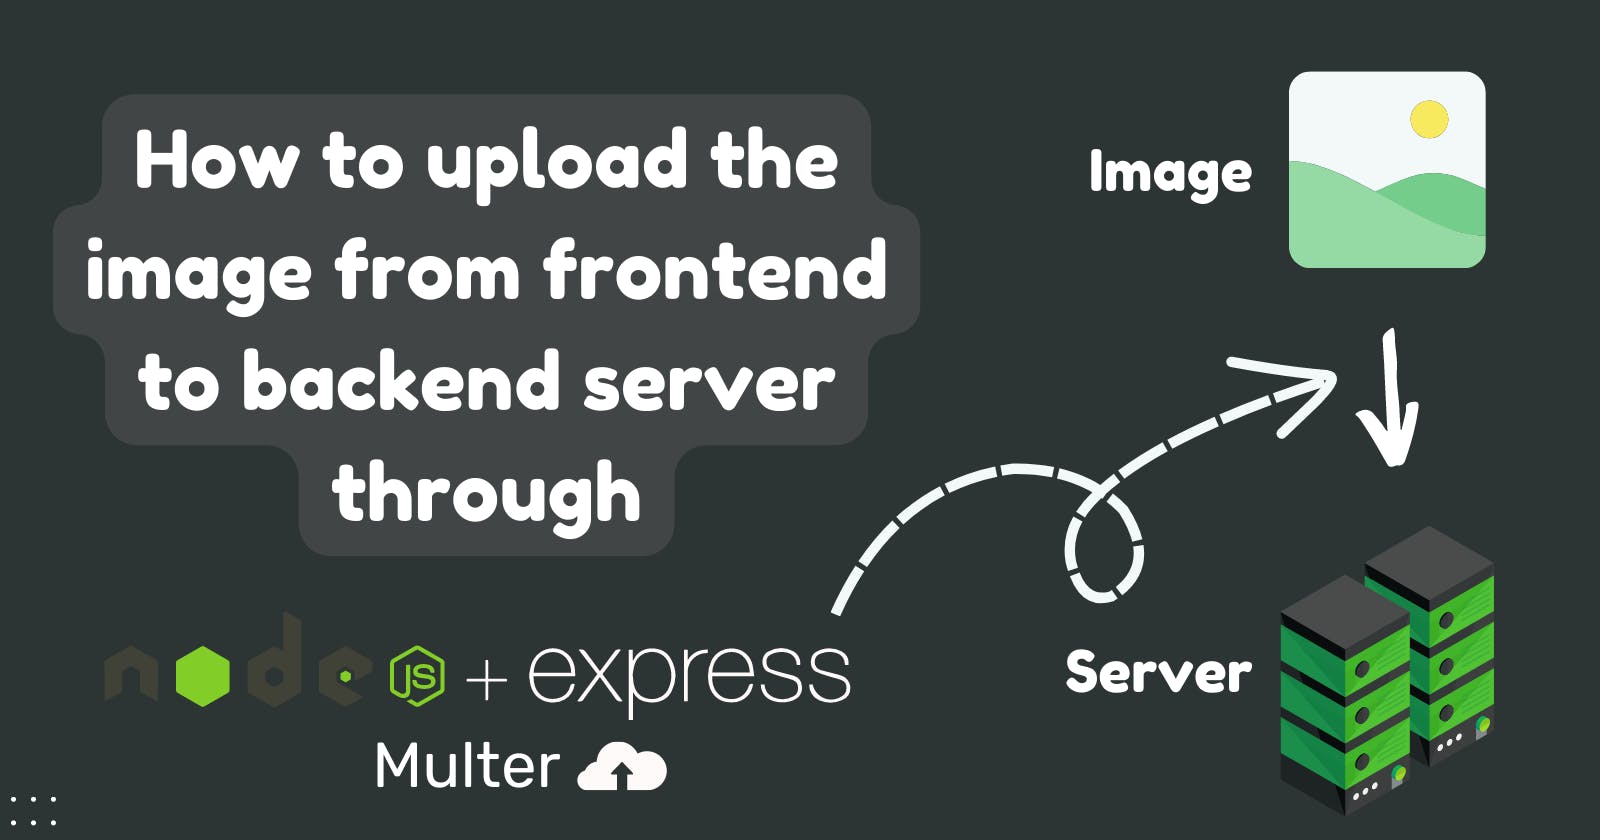


Hey👋, Want to know How to upload an image through Multer to the backend server in React? then This blog might help you to do so. let's get started😉

Overview
Today, We will make a simple image upload system through multer that sends an image from frontend to backend and gives the image URL. We will use ReactJs for frontend, Custom CSS for styling, ExpressJs for backend, and Multer for File handling.
Building process⚒️
The building process is pretty simple. At first, We will create the frontend part which will be a file input box that gets an image from the user and sends the image to the server as a response, we get the image URL and then start to make the backend with Node js and ExpressJs. That's it, Our work is done🤣. That's a rough explanation, Let's dive into the deep process.
Frontend
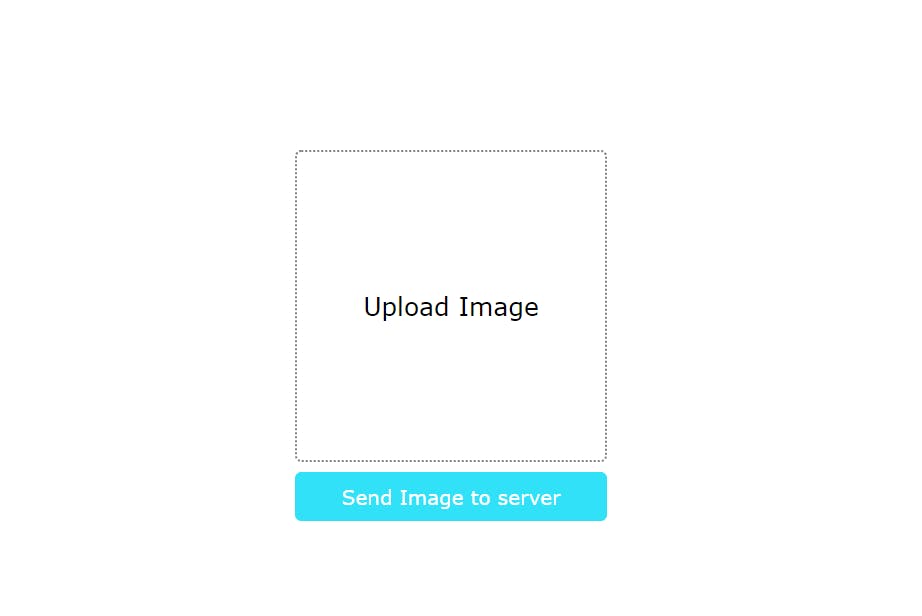
There will not be a fancy frontend part😂. There will be a simple file input box with submit button. Our frontend looks like this:
Prerequisites
We will be using:
-> React js (Frontend)
-> Custom CSS (For styling)
-> Vite js (For development tool)
-> Yarn (Package manager)
-> Package: Axios
Process
At first, We will make a directory named as Img Upload by mkdir Img Upload and jump to that directory by cd Img Upload then We will initialize our project by yarn create vite. We will be using vite rather than CRA(create-react-app) due to the optimized development environment.

Then we will name the frontend side as a client.

Then choose the framework as React.

After that, We will choose the language.

That's It, Our project frame has been crafted.
Now, Just clean up the startup template of vite react app then make the file input box and style it. We won't discuss about styling and all other frontend stuff. So, Frontend look like this:
Now, Let's get the image from the user and store it in two different states for previewing and sending the image to the server. For getting the image from the user, We will make an onChange in the file input box and pass the function picUpload. Like this:
<input type="file" name="img" onChange={picUpload} />
Then, In the function picUpload, Let's get the image and set that image in two state pic (preview) and file (for backend work). Like this:
const [pic, setPic] = useState(null);
const [file, setFile] = useState(null);

const picUpload = (e) => {
    const [file] = e.target.files;
    setPic(URL.createObjectURL(file));
    setFile(file);
 };
Here, URL.createObjectURL() This will create a blob which makes it easy to preview. This new image-picking technique is explained in this blog: Check it out👉 Blog
Now, Let's make a preview mechanism like this:
<input type="file" name="img" onChange={picUpload} />
{pic ? <img src={pic} className="pic" /> : <p>Upload Image</p>}
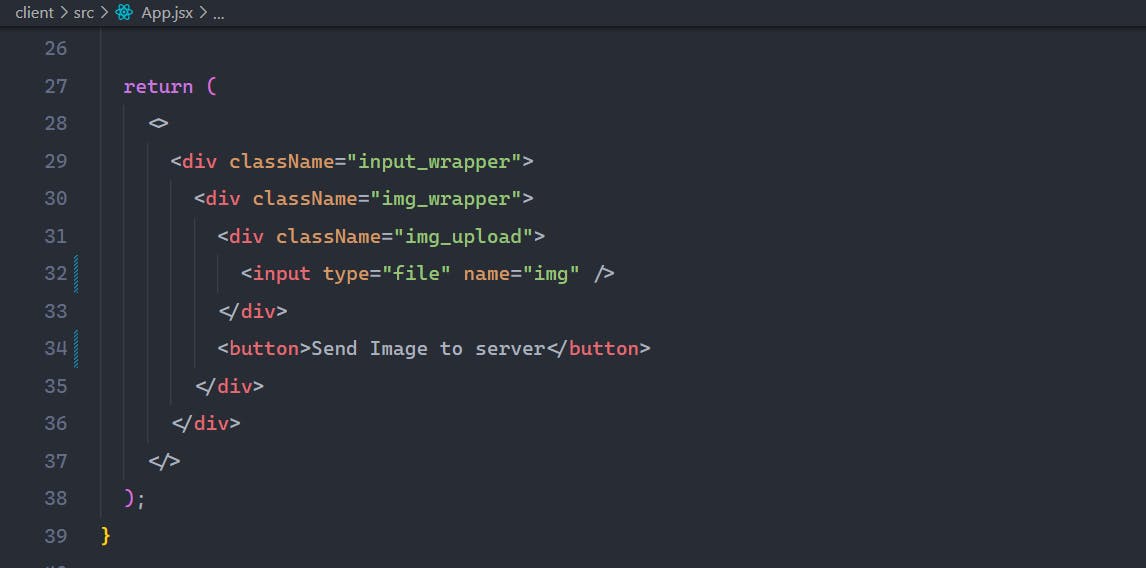
Then pass the function getImgUrl() in submit button to triggered backend work. Final, frontend structure look like this:
<div className="input_wrapper">
      <div className="img_wrapper">
          <div className="img_upload">
            <input type="file" name="img" onChange={picUpload} />
            {pic ? <img src={pic} className="pic" /> : <p>Upload Image</p>}
          </div>
          <button onClick={() => getImgUrl()}>Send Image to server</button>
      </div>
</div>
In getImgUrl function:
const getImgUrl = async() => {
    const formData = new FormData();
    formData.append("pic", file);
    const res = await axios.post("http://localhost:3000/api/upload", formData, {
      headers: {
        "Content-Type": "multipart/form-data",
      },
    });
    const {msg,imgUrl} = res.data;
    console.log(msg);
    alert(imgUrl);
  };
At first, formdata instance is created then the file is appended with formdata with the name pic . This pic will be the same as in the backend that we will discuss in the backend part. Then the post request is sent to a server of the endpoint (localhost:3000/api/upload) which we will create later with the formdata as data and header of form-data.
Then the response(res.data) is destructured in msg and imgUrl which is passed from the backend.
Final frontend look:
Backend
The backend process will be little bit long because We will discuss in-depth about the backend. Let's get started.
Prerequisites
We will be using:
-> Node js / Express js
-> Yarn (Package manager)
-> Packages:
Multer (File handler)
Cors (Incoming request manager)
Nodemon (Self Server starter )
Process
At first, We will create a server folder in the root directory Img Upload by mkdir server and then jump into that directory by cd server. Then we will initialize the node js project by npm init -y then package.json file is created. Now We will install package like express, nodemon, cors, multer by writing this command in terminal:
yarn add express nodemon cors multer
Now, We will setup the node js project in package.json file like this:
{
  "name": "img-upload",
  "version": "1.0.0",
  "main": "server.js",
  "type": "module",
  "scripts": {
    "start": "node server.js",
    "server": "nodemon server.js"
  },
  "keywords": [],
  "author": "",
  "license": "ISC",
  "dependencies": {
    "cors": "^2.8.5",
    "express": "^4.18.1",
    "multer": "^1.4.5-lts.1",
    "nodemon": "^2.0.20"
  },
  "devDependencies": {},
  "description": ""
}
In name field we will write name of project and In main field we will write the name of main file of the server which will be server.js. Then we will add another field which helps to support ES6 that is:
"type":"module"
Now, We will create server.js file then we will initialize the express app and listen to the given port 3000 like this:
//Importing dependencies
import express from "express";
import multer from "multer";
import cors from "cors"

//Making Instances
const app = express();
const port = 3000;

//Middlewares
app.use(express.json());
app.use(cors("*"));

//Routes
app.get("/", (req, res) => res.send("Hello World!"));


//Listening on port
app.listen(port, () => console.log(`Listening on port ${port}!`));
Here, In this above code, At first, We imported the dependencies then make the instances of express as app then define the port at 3000. After that, We make a middleware for using json data by using express.json() and for managing incoming request by using cors("*"). * means anyone can access the server.
Now, we will set up the storage mechanism of multer by setuping the naming system of images that we store and defining the folder which we want to store images on the server. In our case, The folder will be in the server directory named as uploads.
Let's First make the folder uploads by mkdir uploads.
The code to do so will be like this:
// setting up the storage mechanism
const storage = multer.diskStorage({
  filename: function (req, file, cb) {
    cb(null, Date.now() + "--" + file.originalname);
  },
  destination: function (req, file, cb) {
    cb(null, "./uploads");
  },
});
Then we will create the instance of multer with the storage mechanism that we defined above:
const upload = multer({
  storage: storage,
});
After that, We will create the route for serving the static files from the folder that we made above that is uploads(folder in the client directory).
//Serving the static files from the uploads folder.
app.use("/uploads", express.static("uploads"));
Now, This is the core part where we will make the main route of post request of endpoint /api/upload.
//Img Url Route
app.post("/api/upload", upload.single("pic"), async (req, res) => {
  try {
    if (req.file === undefined)
      return res
        .status(400)
        .json({ error: false, msg: "You must select a file." });
    const url =
      req.protocol + "://" + req.get("host") + "/uploads/" + req.file.filename;
    res
      .status(200)
      .json({ error: false, msg: "File uploaded successfully!", imgUrl: url });
  } catch (error) {
    res.status(400).json({ error: true, msg: "Img upload failed" });
  }
});
Here,
upload.single("")act as middleware of multer where the name given inside it should be same as name of formdata that we define in frontend. In our case,The name ispic.
Now, At first, The incoming file from frontend as request through formdata is checked whether is null or not. After that, the Image url is made by combining the:
req.protocol -> It gives the name of protocol in which the backend is running that is http or https request.
req.host -> It gives the main backend url. In our case that is
localhost:3000/uploads/ -> It is name of folder that we define above for storing image.
req.file.filename -> It gives the name of the file that we made in the storage mechanism step.
In this way, the Image URL is made. Then, The image URL is sent as imgUrl to the frontend as a response with status code 200 and msg : File uploaded successfully!.
If any error occurs in the try-catch block, It sends the response with status code 400 and msg: Img upload failed.
In this way, The backend is coded.
The final top-notch backend code looks like this:
//Importing dependencies
import express from "express";
import multer from "multer";
import cors from "cors"

//Making Instances
const app = express();
const port = 3000;

//Middlewares
app.use(express.json());
app.use(cors("*"));


// setting up the storage mechanism
const storage = multer.diskStorage({
  filename: function (req, file, cb) {
    cb(null, Date.now() + "--" + file.originalname);
  },
  destination: function (req, file, cb) {
    cb(null, "./uploads");
  },
});

/* Creating an instance of multer with the storage mechanism we defined above. */
const upload = multer({
  storage: storage,
});

//Routes
app.get("/", (req, res) => res.send("Hello World!"));

//Serving the static files from the uploads folder.
app.use("/uploads", express.static("uploads"));

//Img Url Route
app.post("/api/upload", upload.single("pic"), async (req, res) => {
  try {
    if (req.file === undefined)
      return res
        .status(400)
        .json({ error: false, msg: "You must select a file." });
    const url =
      req.protocol + "://" + req.get("host") + "/uploads/" + req.file.filename;
    res
      .status(200)
      .json({ error: false, msg: "File uploaded successfully!", imgUrl: url });
  } catch (error) {
    res.status(400).json({ error: true, msg: "Img upload failed" });
  }
});

//Listening on port
app.listen(port, () => console.log(`Listening on port ${port}!`));
Hope you learned it🙂.
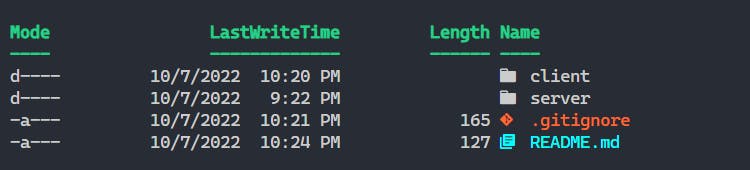
Final folder structure is:
Did you like the customization of the window terminal? If so Let me know in the comment section. I will try to write a detailed blog about it😉.
Testing
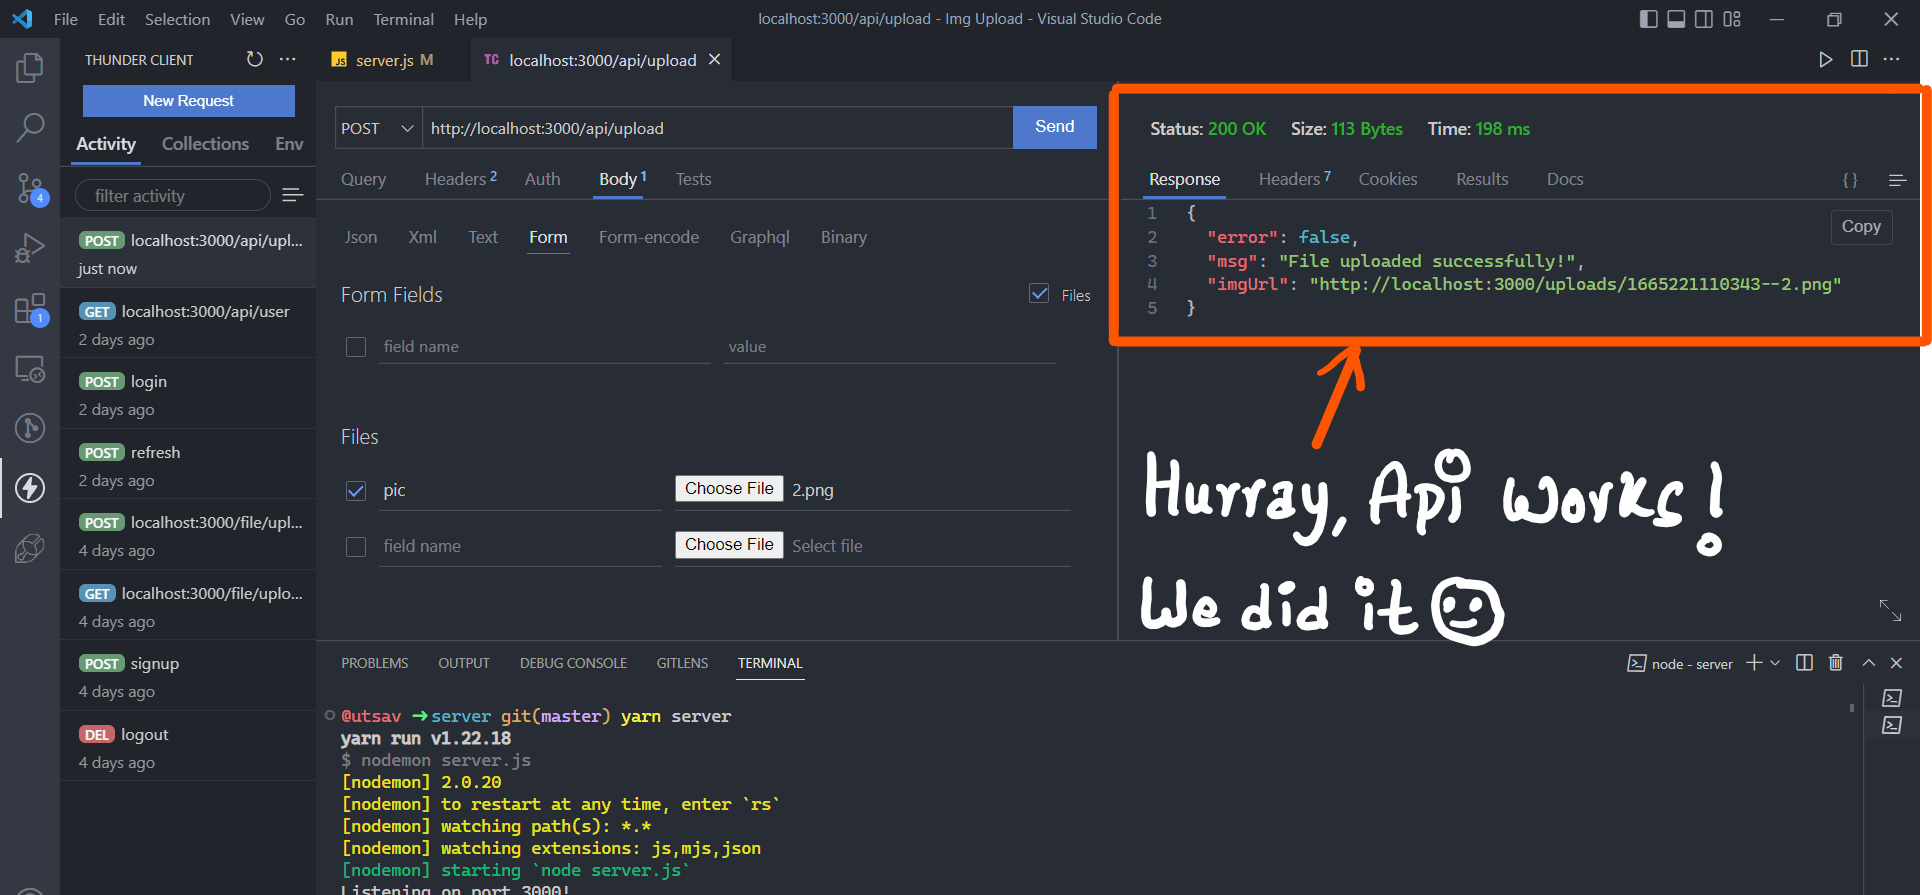
Let's test the backend API through the Vs code extension named as Thunder client.
At first, Let's start the server.
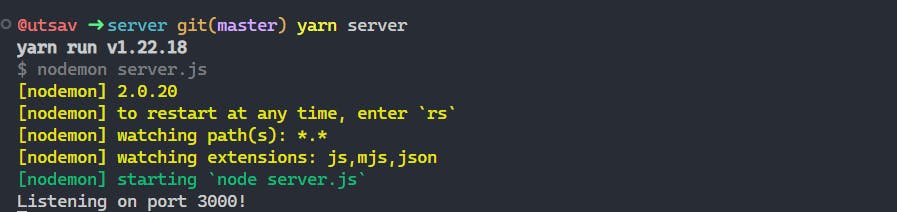
Now, In thunder client, Let's define the endpoint and request method of our backend. Like this:
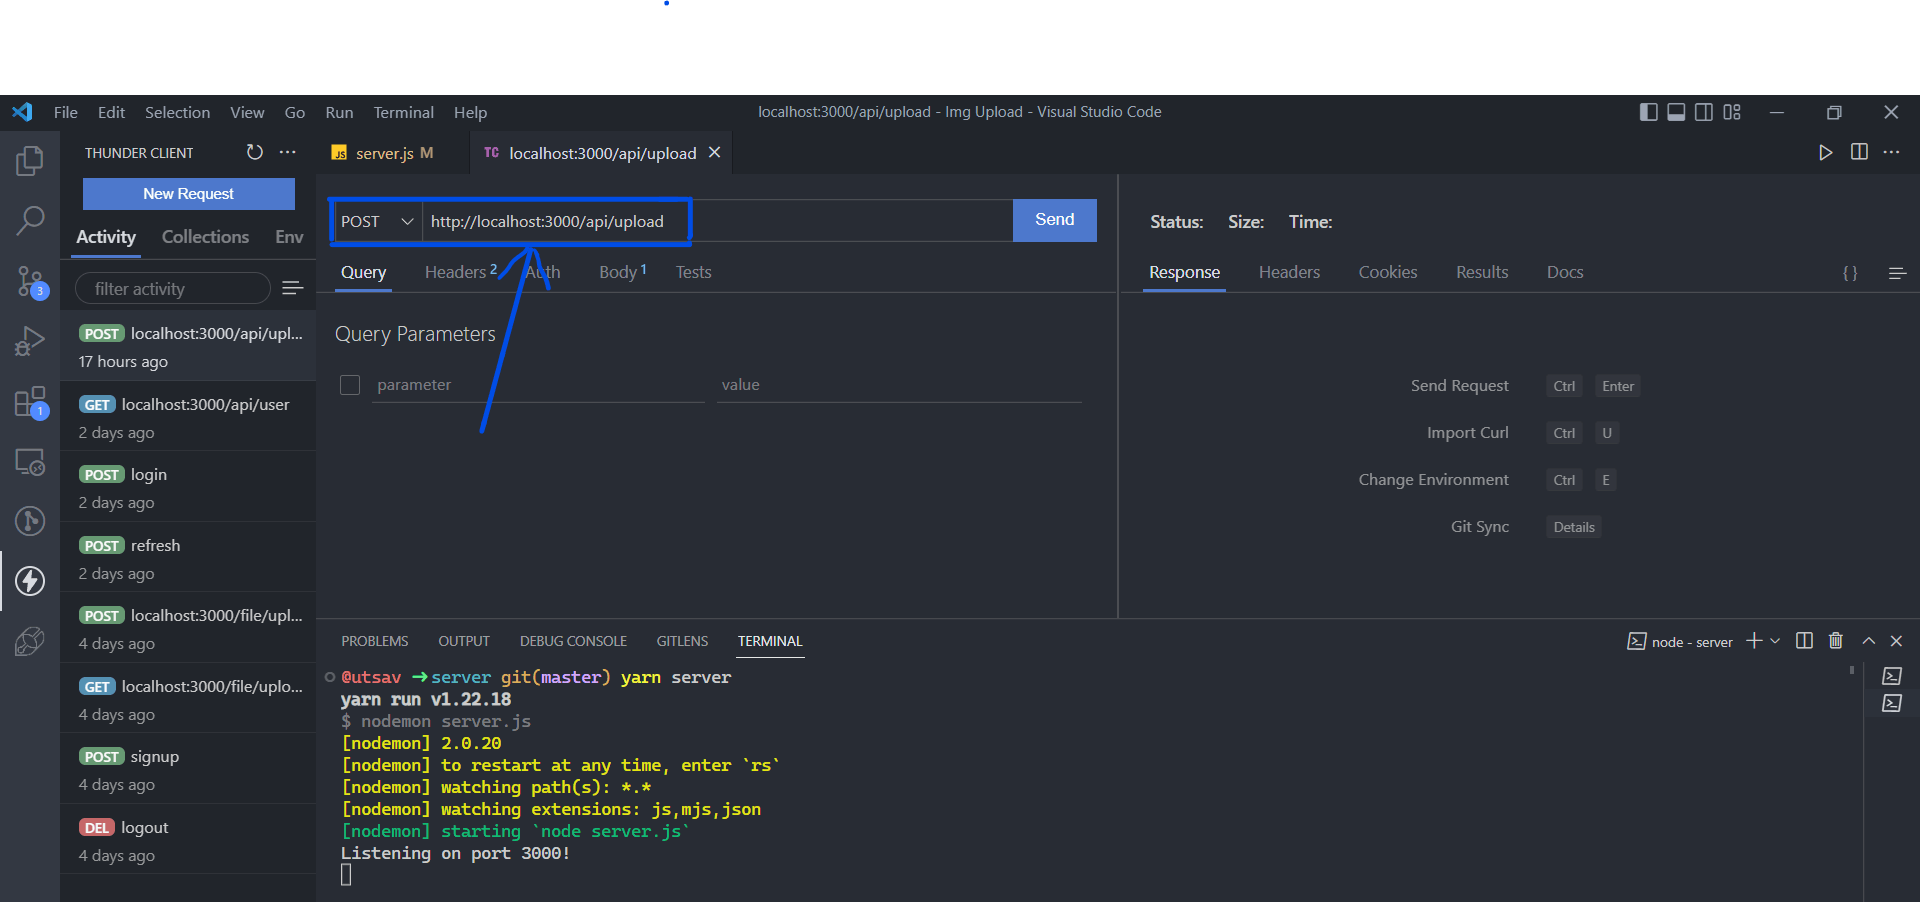
Then,
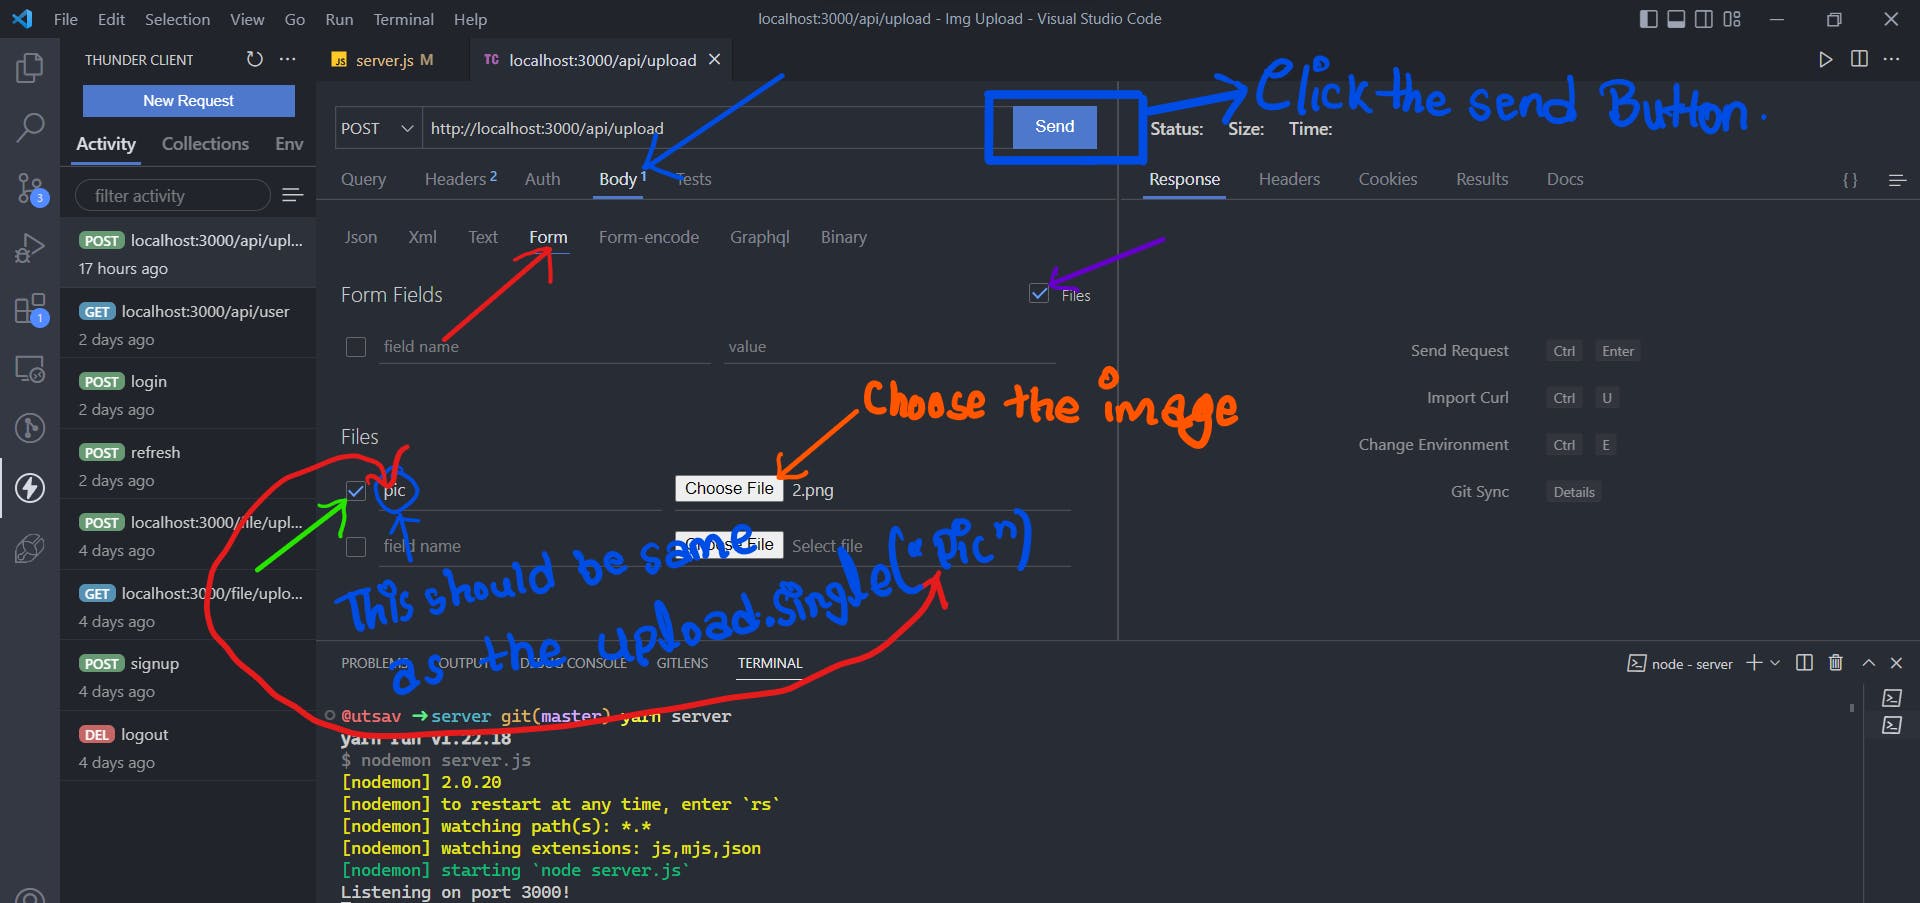
The response is seen as:
Links🔗
Check it out the source code of frontend and backend👇
Source code: Github
Conclusion
In this way, We created the image upload system which stores the image from frontend to backend server.
Connect me through: @utsabdev
Thanks for reading🔥